
Home security cameras installation starts before you buy anything. Many individuals begin when something has already made them uneasy: a delivery goes missing, a neighbour mentions break-ins nearby, or a venue owner realises the rear entry is effectively unobserved after close.
That's usually the right time to act, but it's also when rushed decisions happen. People buy the first kit they see, mount cameras where it's convenient instead of useful, and end up with a system that records plenty of footage and answers very few questions.
A good setup isn't about covering every square metre. It's about capturing the right approach paths, entry points, transaction areas, and blind corners with stable power, reliable recording, and angles that don't create privacy trouble. That applies whether you're protecting a family home, a café storeroom, a small retail tenancy, or a venue perimeter.
Your Guide to a Successful Home Security Cameras Installation
If you run a small business, after-hours security often comes down to one uncomfortable question: if something happens tonight, will your footage be useful tomorrow? Homeowners ask the same thing in a different way. Will the camera catch the person at the gate, or just a blurry shape leaving the driveway?
That gap between “camera installed” and “camera useful” is where most problems sit. The hardware is easy to buy. The hard part is placement, wiring, network setup, privacy boundaries, and knowing when a DIY approach stops being sensible.
The category itself has moved well beyond niche surveillance. The global smart-home security market was valued at USD 11.77 billion in 2025 and is projected to reach USD 56.47 billion by 2033, with a 22.1% CAGR from 2026 to 2033, according to Grand View Research's smart-home security camera market analysis. That matters because Australian households and small businesses aren't choosing from specialist gear anymore. They're choosing from a mainstream market where camera systems are a normal part of protecting property.
For readers weighing options, it helps to look at practical examples of protecting property with security cameras in real Australian settings, especially before locking yourself into a camera type or layout.
What a solid install actually looks like
A workable system usually has these traits:
- Clear purpose for each camera. One camera watches the front gate, another confirms who uses the side entry, another covers the till area or rear stock door.
- Stable recording. The camera stays online, the footage saves properly, and alerts don't become background noise.
- Defensible placement. The angle helps identify activity on your property without creating a dispute with neighbours or patrons.
- Maintainable hardware. You can clean it, power it, update it, and reach it without turning simple upkeep into a ladder job every week.
The best install is rarely the one with the most cameras. It's the one that answers the questions you'll have after an incident.
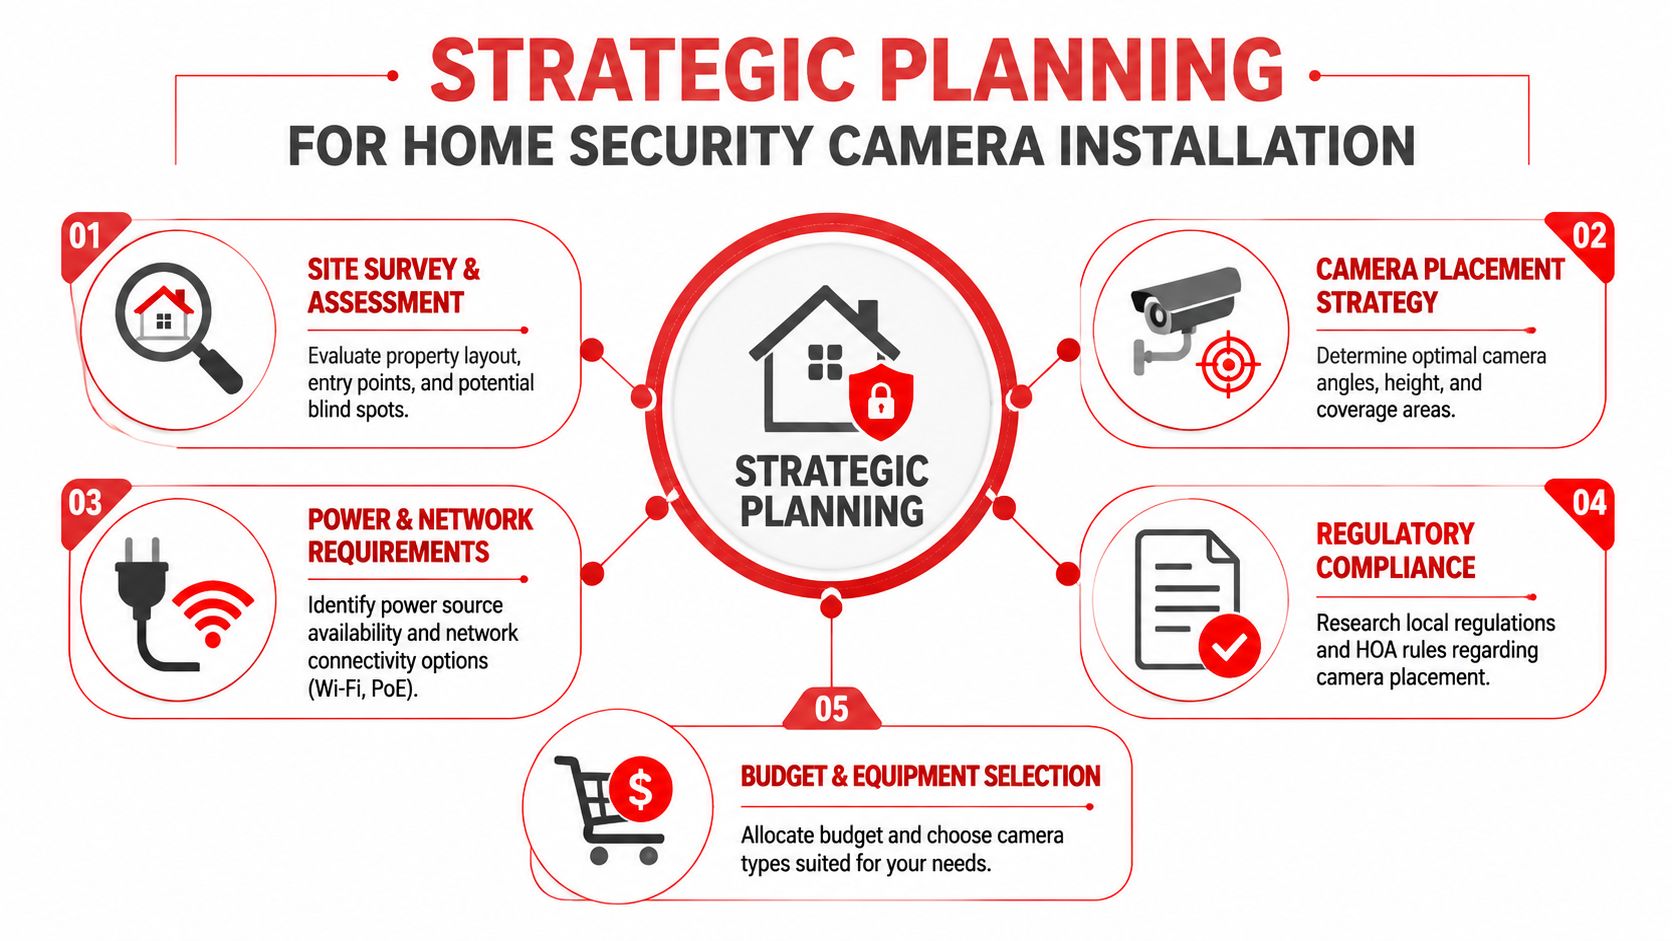
Strategic Planning Before Your Installation
Walk the site first. Don't start from the catalogue. Start from movement: how people approach, where they pause, what they can touch, and which route they'll use if they want to avoid being seen.
For a house, that usually means the front entry, driveway, side access, rear yard gate, and any low-visibility area between the fence line and the building. For a small café, the priorities shift. You're looking at the front door, counter, cash handling area, rear delivery door, cool room access, and any lane or bin area that staff use after dark.
Walk the property like an installer
Do one slow pass in daylight and another around the time the property is least visible. You're looking for three things:
Entry and exit routes
Front doors matter, but side gates and rear service entries often matter more. A person who doesn't want to be seen usually won't choose the obvious path.Decision points
These are places where someone stops, turns, waits, or checks whether they're observed. Gates, narrow walkways, roller doors, and shared access points are common examples.Light and background
A camera aimed into glare, reflective glass, or a bright street behind the subject can give you poor footage even when the camera itself is decent.
Match the camera position to the job
A common professional standard is to mount cameras at at least 10 feet (about 3 metres) high because that height helps reduce tampering while keeping a useful field of view, as noted in Taskrabbit's installation guide.
That doesn't mean every camera should be mounted as high as possible. Height protects the unit, but too much height can make faces less useful and can flatten the angle on important details. For overview coverage, higher mounting often works well. For a gate latch, doorway approach, or service entry where identification matters, the angle needs more care.
Practical rule: If the camera can see the whole area but can't show what a person did with their hands at the gate, the position may be too broad for the job.
Two examples that show the trade-off
Suburban home
A front camera over the garage often gives a strong overview of the driveway and approach. It may not clearly show package handling at the front door if the door sits off to one side. In that case, a second camera focused on the porch does more useful work than widening the first one.
Small café or takeaway shop
One outside camera covering the rear delivery area might show bins, the fence line, and the back door. If staff enter there at night, angle the camera so it captures the approach to the door rather than only the lane. You want context and action, not just motion at the edge of frame.
Plan before you buy
Write down each camera location with a simple note:
- What it must capture
- What can block it
- How it gets power
- How it records
- Who might object to that angle
That last point matters more in Australia than many generic guides admit.
Choosing Your Cameras and Gathering the Right Tools
The right camera isn't the one with the longest feature list. It's the one that fits your site, your tolerance for maintenance, and your wiring reality.
Cost pushes that decision more than many people expect. In 2026, professional installation is estimated to average USD 1,293, with typical ranges of USD 591 to USD 2,040. Installation can account for 50% to 70% of the total system budget. For a four-camera CCTV setup, typical installed costs are cited at USD 600 to USD 1,600, and labour for wired systems can run USD 80 to USD 200 per camera, according to Angi's surveillance camera installation cost guide. That's why the choice between PoE, Wi-Fi, and battery isn't just technical. It changes the install labour, finish quality, and long-term maintenance.
Security camera type comparison for home security cameras installation
| Feature | PoE (Wired) | Wi-Fi (Wireless) | Battery-Powered |
|---|---|---|---|
| Reliability | Strong when cabling is done properly | Depends on signal quality and router stability | Convenient, but depends on charging discipline |
| Installation difficulty | Highest | Moderate | Lowest |
| Best fit | Small business, permanent home installs, multi-camera systems | Homes and small sites with stable Wi-Fi and nearby power | Renters, temporary coverage, low-commitment installs |
| Ongoing maintenance | Low after installation | Moderate, especially if signal changes | Higher because batteries need recharging or replacement |
| Cable visibility | Can be very neat if planned well | Usually only power cable to manage | Minimal visible cable |
| Recording confidence | Strong for always-on recording | Good if network is solid | Varies by device behaviour and battery state |
What works best in practice
PoE cameras suit owners who want a stable, permanent system. They're a strong fit for retail, hospitality, workshops, and houses where you can access roof space or wall cavities. The trade-off is labour. Cable runs, penetration points, outdoor sealing, and terminations all need care.
Wi-Fi cameras suit homes and small premises where you can get power close to the mounting point and the wireless signal is proven strong. The trap is assuming a phone's internet connection in that spot means the camera will behave well there too. Cameras are less forgiving than people expect.
Battery cameras suit simple jobs, rentals, sheds, or short-term placements. They're also useful where drilling or mains power is a problem. The trade-off is obvious. If nobody keeps up with charging, your security depends on memory and good intentions.
Tool kit for a tidy install
You don't need a workshop full of gear, but you do need the right basics:
- Drill and bits for masonry, timber, or metal depending on the surface
- Stud finder before drilling into internal walls
- Fish tape if you're pulling cable through wall or ceiling spaces
- Exterior-rated fixings for outdoor brackets
- Sealant to close cable penetrations against water and insects
- Cable clips or conduit to protect and tidy exposed runs
- Ladder suited to the mounting height
- Marker, tape measure, and level so the bracket goes where you think it will
If your DIY kit is thin, Value Tools Co's homeowner tool guide is a useful starting point for the essentials before you begin drilling holes in external walls.
A good buying rule
Buy the camera that matches the environment, not the marketing. A rear laneway camera for a café has different demands from a front porch camera at home. Treating them as the same job is how people overspend on the wrong feature set.
A Practical Guide to Mounting and Wiring Your Security Cameras
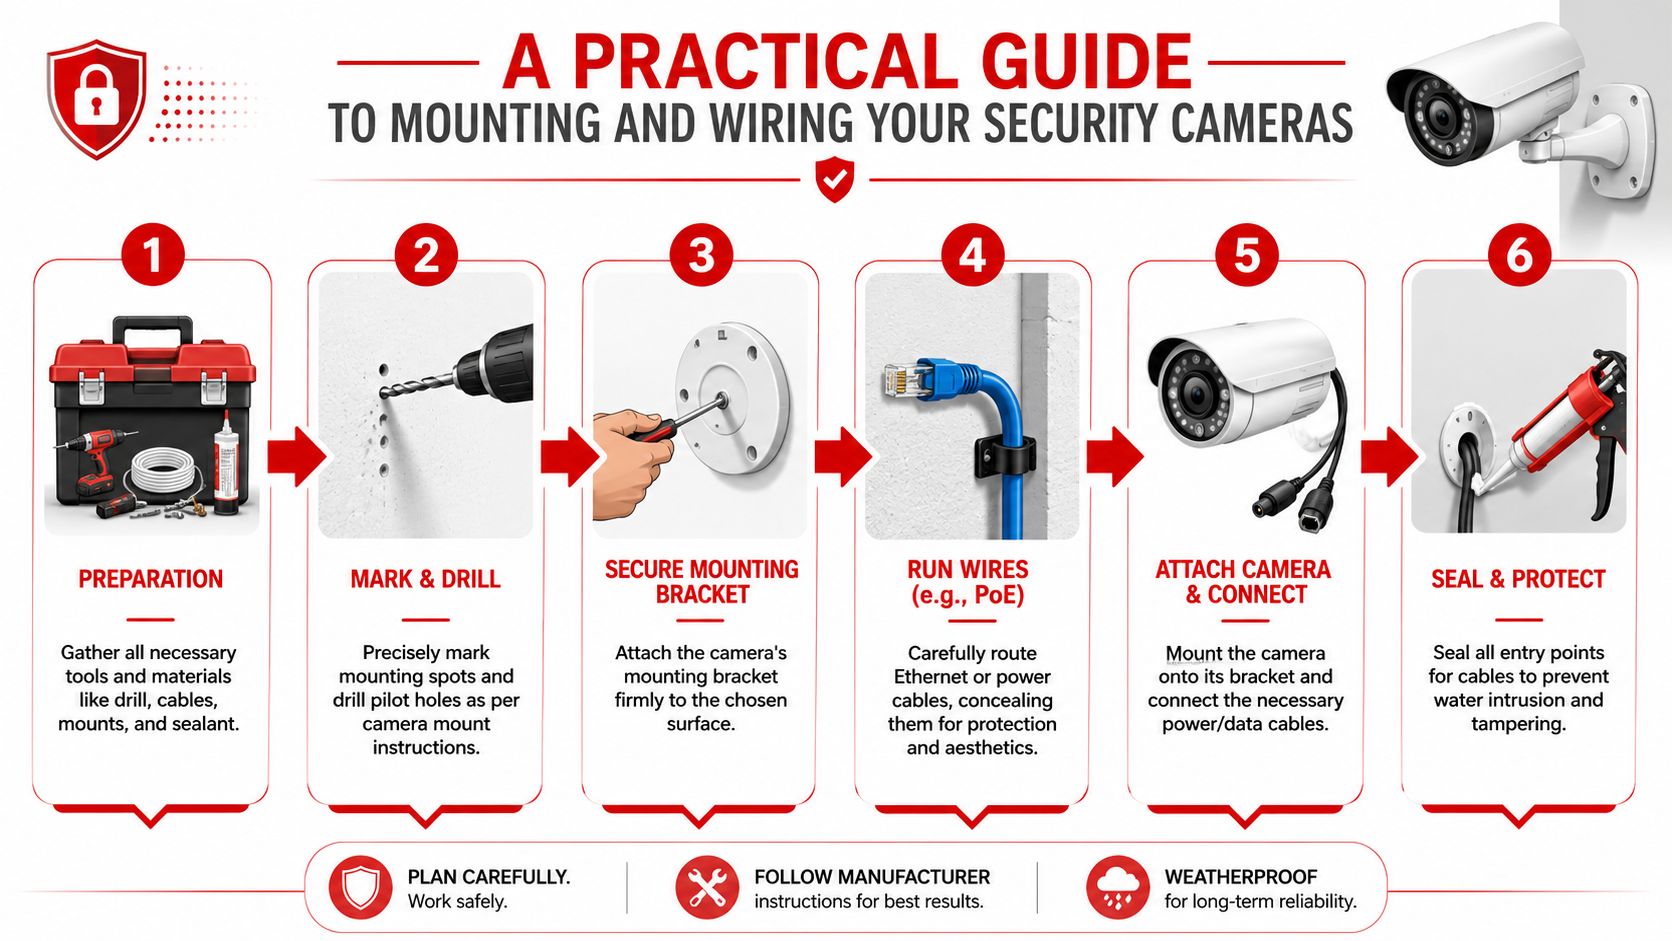
Most installation mistakes happen in the first hour. The camera gets mounted before it's tested, the cable path is guessed instead of planned, or the bracket is fixed to a weak surface and starts shifting later.
The cleaner approach is slower at the start and faster overall.
Use software first, not the drill first
A strong workflow is software-first commissioning. Temporarily power the camera, open the app, check the live feed, confirm signal quality and framing, then mount it permanently only after the feed is stable, as recommended in Security.org's camera installation guide.
That one habit avoids a lot of rework. It catches weak Wi-Fi, ugly glare, false motion zones, and poor framing before you commit to holes, anchors, and sealant.
Don't fix the bracket until you know the camera sees what you need and stays connected where you need it.
Mounting sequence that saves trouble
Use a repeatable sequence for every camera:
Hold the camera in position temporarily
Tape, a temporary clamp, or a helper is enough. Check the live view on your phone or laptop.Confirm the actual scene
Don't just look at the wide frame. Walk through it. Open the gate. Stand at the door. Move through the path a person would use.Mark the bracket holes
Once the view is right, mark carefully. Small errors here become skewed footage later.Check the surface before drilling
Brick, weatherboard, rendered masonry, sheet cladding, and plasterboard all behave differently. Use fixings that suit the surface, not whatever came loose in the box.Mount the bracket firmly
The bracket should not flex when you put pressure on it by hand. If it moves now, it will move more after wind, heat, and time.Seal penetrations
Any hole that carries a cable through an external wall should be sealed properly.
Safety note: Use a stud finder and check for hidden wiring before drilling. A neat install isn't worth hitting electrical wiring or creating structural damage.
Wiring decisions that matter later
For PoE systems, cable planning is the job. Decide where every run begins, where it enters the building, how it reaches the recorder or network point, and how it's protected outside. If the route passes through walls or tight cavities, fish tape helps. If the cable stays exposed outdoors, conduit or secure exterior protection is the better choice.
Poor cable routing causes avoidable failures. Cables left loose can be cut, snagged, weather-damaged, or look amateurish. Secure exterior runs also reduce the chance of water finding its way into the building through a sloppy entry point.
For Wi-Fi cameras, the physical challenge is usually power rather than data. A camera can have full wireless signal but still be a poor install if the plug pack sits in an exposed position, the cable is under strain, or the power source is awkward to reach.
For battery units, focus on safe access. If recharging means dragging out a tall ladder every few weeks, the setup isn't practical. Battery cameras work best where you can service them easily.
Surface-by-surface advice
Brick or masonry
Usually stable and suitable, but use the right masonry bit and anchors. Don't overtighten into brittle render.Weatherboard or cladding
Good for neat installs, but make sure the fixing reaches something solid where required. Thin external skin alone may not hold well.Drywall or plasterboard
Fine for internal cameras, but not for unsupported outdoor mounting. If the camera sits on a weak substrate, expect movement.
One mistake DIYers repeat
They centre the camera based on the wall, not the target area. Symmetry looks good from the ground, but good security footage comes from useful framing, not neat geometry.
Configuring Your Network and Camera Software
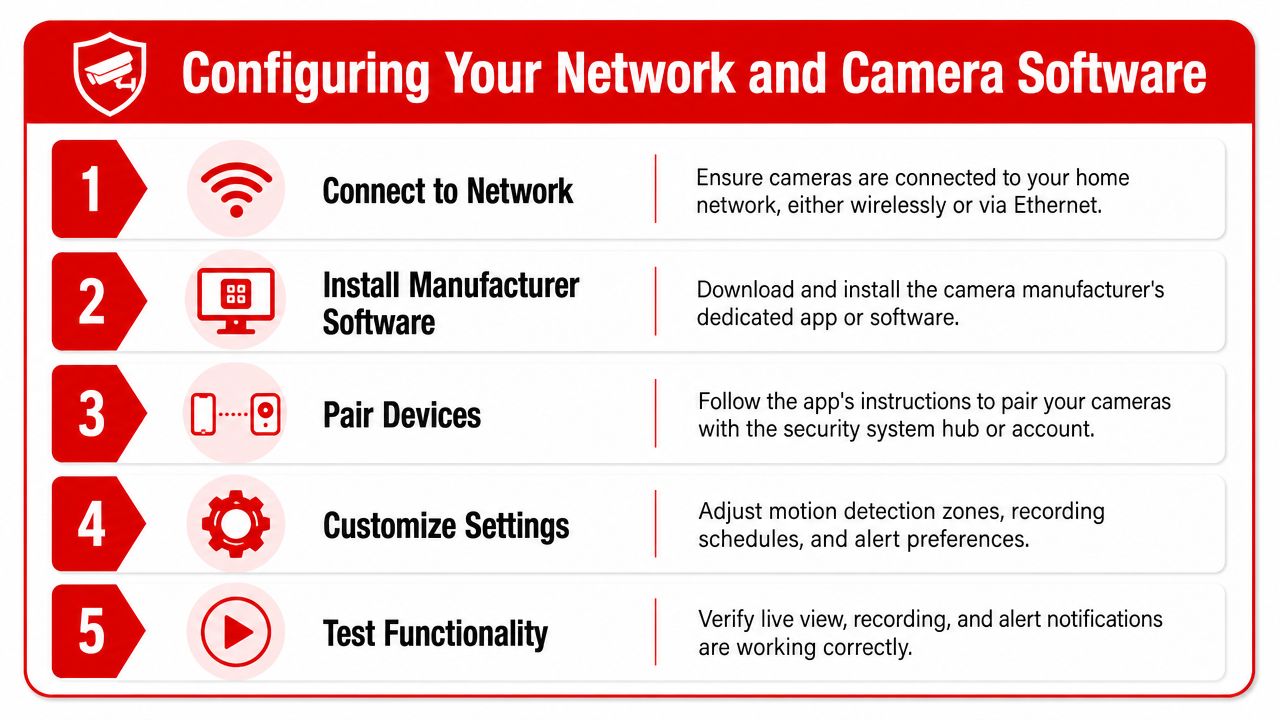
Once the hardware is in place, the camera still isn't doing its job until the software is tuned properly. Improper software tuning often leads to many systems going from “installed” to “annoying” because every passing car, moving tree, or staff member taking bins out triggers an alert.
Set up the front entrance properly
Take a common example. A front entrance camera covers the porch, path, and part of the street. If you leave motion detection on the default setting, the system may alert you for vehicles, headlights, shadows, and pedestrians who never step onto your property.
A better setup is narrower and more deliberate:
- Create a motion zone around the path, gate opening, porch, or threshold
- Exclude the road if traffic isn't relevant
- Lower sensitivity if moving plants or shifting light trigger false alerts
- Set recording rules so the camera records what matters without filling storage with noise
For a small business, apply the same logic to a rear service door. Include the doorway, landing area, and access path. Exclude public foot traffic that doesn't interact with the premises.
Check the useful settings first
Many users spend time on cosmetic settings and ignore the practical ones. Start with these:
- Live view stability so you know the stream stays up
- Recording mode to confirm how and when footage is saved
- Notifications so the right person gets alerted at the right time
- Time and date accuracy because footage without correct timestamps creates headaches later
- Playback testing so you know how quickly you can find an event when needed
Keep alerts useful
If every movement causes a ping, people mute the app. Once that happens, the system turns into a passive recorder and loses half its value.
Useful alerts are selective. If your phone goes off constantly for irrelevant motion, the setup is wrong, not “sensitive”.
For venues and small businesses with staff access after hours, think about schedules. Some areas may need active alerts only outside trading hours, while others should record continuously without interrupting anyone during service.
Optimising Performance and Ensuring Privacy Compliance
A camera that records well and causes a privacy dispute is still a bad installation. In Australia, that part isn't optional.
Guidance relevant to NSW and the ACT stresses that recording private activities without consent can create legal risk, and one of the most common mistakes is poor placement that captures a neighbour's private property, leading to complaints and disputes, as discussed in this outdoor camera placement guide referencing Australian privacy considerations.
What privacy trouble looks like in real life
The problem usually isn't a camera facing the street in a broad sense. The problem is a camera angled too far into someone else's private area. Shared driveways, townhouse side paths, apartment entries, small-lot boundaries, rear laneways, and neighbouring outdoor living areas are where disputes start.
If you're securing a home, avoid bedrooms, bathrooms, fenced private areas, and neighbouring windows. If you run a small business or venue, be especially careful with cameras near staff areas, residential boundaries, and shared access corridors.
Final checks before you call the job done
Use a simple test pass:
- Walk every active zone during the day and at night
- Review night vision clarity for faces, gates, doors, and hand movements
- Check edges of frame where motion may trigger but detail may be poor
- Confirm the angle stays on your property purpose, not someone else's private use area
Privacy compliance protects you as much as anyone else. A badly aimed camera can turn a sensible security upgrade into a complaint, a dispute, or a legal issue that was easy to avoid.
Maintaining Your System and Knowing When to Call for Professional Help
A camera system isn't finished on installation day. Dust settles on lenses, spiders build webs in front of infrared lamps, cables loosen, firmware ages, and recorders subtly stop behaving the way you think they do.
A short maintenance routine prevents most of that.
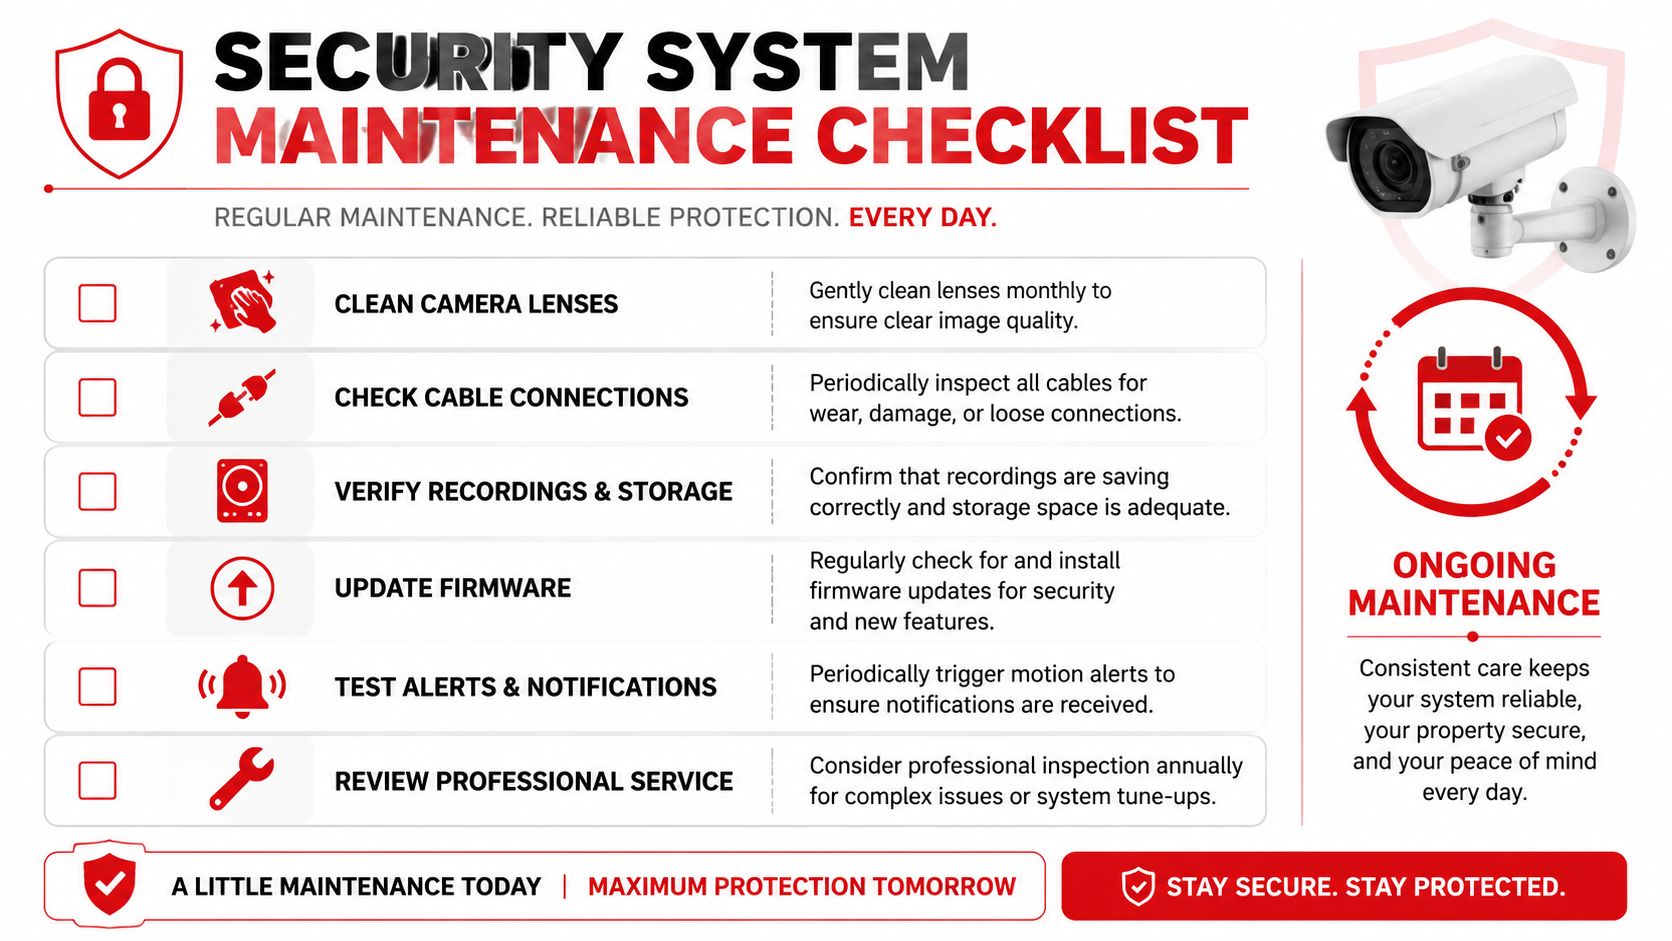
Ongoing checks worth doing
- Clean the lens so dirt, salt, cobwebs, and pollen don't soften the image
- Inspect brackets and cables for movement, wear, or weather exposure
- Verify recordings by playing back recent footage rather than assuming it saved
- Update firmware when the manufacturer releases fixes
- Test alerts by triggering a known event and checking whether the notification arrives
When DIY becomes the risky option
Call a professional when the job involves difficult cable routes, high mounting points, uncertain wall contents, complex business requirements, or public-facing risk. That includes multi-building sites, venues with patrons, construction compounds, and any setup where footage may need to support incident review or compliance obligations.
If electrical work may be involved beyond straightforward plug-in hardware, it's worth reviewing Jolt Electric's hiring guide before engaging a tradesperson.
There's also a line where cameras alone aren't enough. If you need guard presence, after-hours patrols, back-to-base monitoring, emergency response, or broader site security coordination, a provider such as GM GROUP Services fits that operational role for businesses, venues, events, and higher-risk premises.
A good rule is simple. DIY works well when the system is small, accessible, and easy to maintain. Bring in experienced help when failure would be expensive, unsafe, or hard to unwind.
FAQ about home security cameras installation
Can I install home security cameras myself?
Yes, if the layout is simple, the mounting points are safe to reach, and you can test power, signal, and recording properly before final mounting. DIY becomes less sensible when cabling is complex or the site has public-facing risk.
What's the best height for outdoor cameras?
A common professional standard is at least 10 feet or about 3 metres for tamper resistance and a practical field of view, as noted earlier. Final height still depends on what the camera needs to capture.
Should I choose PoE, Wi-Fi, or battery cameras?
Choose based on the property and your maintenance tolerance. PoE is often strongest for permanent installs. Wi-Fi works well where signal and power are reliable. Battery cameras suit easier, lighter-duty jobs.
How do I avoid false alerts?
Set motion zones tightly, exclude roads and irrelevant background movement, and adjust sensitivity after live testing.
Can my camera face a shared driveway?
Sometimes, but be careful. Shared spaces create privacy and neighbour issues quickly if the framing reaches into someone else's private area.
When should a business skip DIY?
Skip DIY when the premises handle cash, late trading, public access, rear laneway entry, staff-only areas, or any requirement for dependable footage and incident response.
If your site needs more than a basic camera setup, such as venue security, patrols, emergency response, or broader protection planning, GM GROUP Services provides licensed security services across NSW, Victoria, Queensland and the ACT for events, venues, retail, construction, and business environments.
Discover more from GM Group Services
Subscribe to get the latest posts sent to your email.