

Learning how to write an incident report is arguably one of the most critical skills you can master in security, event management, or any supervisory role. Let’s be honest, no one gets into these fields for the paperwork. But a solid report is far more than just ticking boxes; it's about creating a permanent, official record of exactly what happened, who was involved, and the immediate steps you took.
A well-written report is your best friend when it comes to ensuring safety, navigating legal matters, and processing insurance claims. This guide provides actionable insights to get it right every time.
Why Mastering How to Write an Incident Report is Non-Negotiable
For any professional in security, event management, or site supervision, knowing how to write a clear and accurate report isn't just a good idea—it's a core responsibility. Think of it as your first line of defence. A detailed report can be the deciding factor in a legal dispute, the key to a successful insurance claim, and the raw data you need to build smarter, safer protocols for the future.
It’s how you turn a chaotic moment into a structured record that protects your people, your assets, and your organisation's reputation.


The High Stakes of Poor Documentation
The difference between a good report and a bad one is night and day. Imagine two reports from a large music festival.
One just says, "Guest was disruptive and removed." That's completely useless. It gives you no context, no timeline, no witness details, and absolutely nothing to learn from.
Now, consider this version: "At 21:15, John Doe (Patron ID #12345) was observed verbally harassing guests near the main stage. Security Officer Smith responded at 21:17, de-escalated the situation, and escorted Mr. Doe to the exit at 21:20 per venue policy. Witness Jane Roe provided a statement." This report is a powerful tool that will stand up to scrutiny every time.
With regulatory oversight getting stricter, the financial and legal fallout from lazy documentation can be massive. This applies to physical incidents and digital ones, too. For example, Australia saw a 25% increase in notifiable data breaches, with 1,113 incidents reported by the OAIC. Good reporting is crucial for meeting compliance obligations like the Notifiable Data Breaches (NDB) scheme and providing solid evidence for investigations. You can dig into more data breach trends over at Riskonnect.
A well-written incident report is not just a reactive measure; it's a proactive strategy. It provides the clear-eyed data needed to identify patterns, address vulnerabilities, and prevent future occurrences, ultimately fostering a safer environment for everyone.
This guide will walk you through the practical steps and insider tips you need to nail this skill, ensuring every report you write is clear, comprehensive, and defensible.
The Core Components of a Bulletproof Incident Report
Knowing how to write an incident report that stands up to scrutiny is all about understanding its anatomy. A vague or incomplete report is almost as useless as no report at all. To make it truly bulletproof, you need to go beyond a simple checklist and get why each piece of information matters. Every field you fill out has a specific job to do, and together they create a clear, factual, and defensible record of what went down.
This isn't just about ticking boxes. From the foundational '5 Ws' to finer details like the immediate actions you took, each component is a crucial piece of the puzzle. Getting this structure right means nothing critical gets missed, whether you're documenting a patron dispute in a packed venue or a safety hazard on a quiet worksite.

The Foundational Five Ws
Every single report has to start with the basics to set the scene. Think of this as the non-negotiable foundation; without these core facts, the rest of the story you're telling is built on shaky ground.
Here’s what you absolutely must nail down first:
- Who: Get the full name and role of everyone involved (e.g., patron, staff member, contractor, witness). Nicknames don't cut it.
- What: Describe the incident in a nutshell (e.g., 'Slip and Fall', 'Verbal Altercation', 'Unauthorised Entry'). Keep it brief and factual.
- Where: Be surgically precise. "Near the main bar" is lazy. "2 metres east of the main bar's POS terminal" is professional.
- When: Lock in the exact date and time. Always use a 24-hour format (like 23:15) to kill any A.M./P.M. confusion.
- Why: This isn't about playing psychologist. It's about stating the known lead-up factors (e.g., "Patron was running on a wet floor," "Argument started over a spilled drink").
Nailing these five points gives anyone reading the report an immediate snapshot of the event, letting them grasp the fundamentals in seconds.
Beyond The Basics: Essential Details To Include
Once that foundation is solid, it's time to add the layers of detail that give the report its real value for investigations, follow-ups, or potential legal reviews. This is where you show your professionalism.
Immediate Actions Taken: Write down every single thing your team did in response. Who responded? What time? What exactly did they do? For instance, "Security Officer Jane Doe responded at 21:05, separated the individuals, and called for first aid." This section is absolutely vital for proving you followed procedure and acted responsibly.
Injuries and Damages: Be specific and objective. Log any visible injuries, complaints of pain, or damage to property. Don't write "a bad cut"—instead, use precise language like "a 2cm laceration on the left forearm." For property, note the item and the damage (e.g., "One glass window pane shattered.").
Witness Information: Grab the names and contact details of anyone who saw what happened. Make a note of where they were standing in relation to the incident and whether they're willing to give a formal statement. Their perspective can be gold for backing up your account.
To make sure you capture everything consistently, especially when things are chaotic, a good workplace incident report template is a lifesaver. It prompts your staff to record every critical detail, preventing things from being missed in the heat of the moment.
A great incident report tells a story without being a storyteller. It presents the facts in such a clear, chronological order that the reader can visualise the event exactly as it happened, free from opinion or embellishment.
The table below breaks down these essential fields with practical examples you'd see in a licensed venue—a common scenario for security professionals. Use this as a guide to make sure your reports are always complete and effective.
Essential Fields for Your Incident Report
A solid report hinges on including the right information every time. Here's a breakdown of the must-have fields.
| Field Name | Purpose | Practical Example (Licensed Venue Scenario) |
|---|---|---|
| Incident Type & Date/Time | To categorise the event and establish a precise timeline. | 'Physical Altercation – 23:45, 15 November' |
| Location of Incident | To pinpoint the exact area for investigation and future prevention. | 'Main dance floor, near the east exit.' |
| Involved Parties (Names & Details) | To identify all individuals (victims, witnesses, perpetrators) for follow-up. | 'Patron A: John Smith (DOB 01/02/1995), Witness: Jane Doe (Staff)' |
| Factual, Chronological Narrative | To provide an unbiased, step-by-step account of what occurred. | '23:45: Verbal argument began. 23:47: Escalated to pushing. 23:48: Security intervened.' |
| Injuries or Damage | To document all harm to persons or property for medical and insurance purposes. | 'J. Smith reported a bruised left cheek. No visible property damage.' |
| Actions Taken by Staff | To record the immediate response and demonstrate due diligence. | 'Separated individuals, administered first aid, escorted J. Smith to a quiet area.' |
| Witness Statements | To capture third-party perspectives to corroborate the narrative. | 'See attached statement from J. Doe, who observed the initial argument.' |
| Evidence Collected | To list all physical or digital evidence secured. | 'CCTV footage from Camera 5 (23:40-23:55) saved. One photograph of injury taken.' |
Treating this structure as your go-to framework will ensure your reports are consistently comprehensive and, most importantly, useful.
Writing a Factual and Objective Narrative
Getting the narrative right is the absolute core of a solid incident report. This is where you lay out exactly what happened, step by step. Think of it as painting a picture for someone who wasn't there. Your goal is to create a crystal-clear account that's purely factual, told in chronological order, and completely stripped of personal opinions or emotional language.
This isn't the place to play detective, make assumptions, or guess what someone was thinking. The narrative has one job: to present an unbiased sequence of events based on what you directly saw and heard. Sticking to this discipline is what turns a simple write-up into a professional, defensible document.
The Golden Rule: Stick to the Facts
Objectivity is everything. Your role is to be a camera, recording what happens without adding your own commentary or feelings about the people involved. This can be tougher than it sounds, especially when adrenaline is pumping after a tense situation.
A classic mistake is letting subjective language creep in. Words like "aggressive," "angry," or "uncooperative" are your interpretations, not cold, hard facts. Instead of labelling someone's behaviour, describe the actions that made you think that.

Let's look at a quick example.
- Weak (Subjective): "The patron became aggressive and started causing trouble."
- Strong (Objective): "The patron raised their voice, pointed a finger at staff, and knocked over a chair."
See the difference? The second version gives the reader the evidence and lets them draw their own conclusions. That distinction is absolutely critical when the report is reviewed later, especially for legal reasons.
"The moment you write down an opinion—'he seemed drunk' or 'she was looking for a fight'—you have weakened your report. Stick to sensory details: 'He was unsteady on his feet and his speech was slurred.' 'She stated, ‘I’m going to cause a problem.’' Facts are defensible; opinions are not."
Weaving a Clear Chronological Story
Your narrative needs to flow like a timeline. You want to walk the reader through the events as they unfolded, from start to finish. Using specific timestamps for every key action is the best way to build this clear, easy-to-follow sequence. This structure cuts out any confusion and helps investigators get a firm grasp on how the situation evolved.
Start from the very beginning of the incident (or from the moment you became involved) and document each step as it happened.
Practical Example: Timeline Structure
- 22:10: I observed two male patrons, Patron A and Patron B, in a loud verbal dispute near the main entrance.
- 22:11: I approached both individuals and asked them to lower their voices. Patron B swore at me.
- 22:12: Patron A pushed Patron B in the chest. I immediately stepped between them and called for backup on my radio.
- 22:14: Security Officer Evans arrived. We escorted both patrons outside separately to de-escalate the situation.
This format is clean, precise, and leaves no room for guessing. It also shows a professional and controlled response, which looks great for internal reviews and can be a lifesaver from a liability standpoint.
The Power of Direct Quotes and Sensory Details
When you're writing down what people said, always use direct quotes if you can. Quoting someone word-for-word removes any chance that you might misinterpret what they meant. It's the most accurate way to record a conversation.
- Vague: "The witness said the patron was threatening her."
- Specific: "Witness Jane Doe stated, 'He looked right at me and said, I know where you work.'"
Along the same lines, focus on sensory details—what did you actually see and hear? If the environment played a part, note it down. Was the floor wet? Was the lighting poor? Were there loud noises making it hard to communicate? These little details add crucial context and can help explain why something happened. If you need a refresher on keeping things impartial, this guide on how to write an objective summary is a great resource.
This level of detail isn't just about covering your bases; it's vital for helping the organisation learn. For instance, recent OAIC data showed human error was behind 37% of all data breaches, a big jump from 29% in the previous period. Every well-written report adds to a bigger picture, helping management spot patterns in training or procedure that need fixing before a more serious incident occurs.
Handling Evidence to Strengthen Your Report
When you're learning how to write an incident report, you quickly realise the story you tell is only half the battle. The evidence you gather is what makes it credible. It’s what makes it defensible.
Without solid, correctly handled evidence, your words are just that—words. Evidence is the tangible proof that turns a good report into a bulletproof one.
Proper evidence management is a non-negotiable skill. It’s more than just snapping a quick photo on your phone. It's about systematically collecting, documenting, and preserving information in a way that keeps its integrity intact. This process is absolutely crucial, whether it’s for an internal review, an insurance claim, or potential legal proceedings down the track.
Securing Witness Statements
Witness statements are often the most powerful tool in your arsenal. They provide an independent, third-party account that can back up everything you’ve reported. But, and this is a big but, they have to be handled correctly to have any real value.
Your goal is to capture what they saw, completely free from influence. Here's how to do it right:
- Use a Standard Form: Always have a dedicated witness statement form ready to go. It ensures you don't miss crucial details like their full name, contact info, and exactly where they were when the incident happened.
- Isolate Witnesses: This is a big one. If you can, speak to each witness separately. This stops their accounts from being influenced by what others are saying, a common issue known as memory conformity.
- Get That Signature: A statement is useless without a signature and date. It's the final step that confirms the witness has read it over and agrees it's an accurate account of what they saw at that specific time.
Capturing Effective Photographic and Video Evidence
We’ve all heard it: a picture is worth a thousand words. But that's only if it's a good picture. Poor-quality photos or shaky videos can create more confusion than they solve. Your aim here is to capture the scene exactly as it was, with zero ambiguity.
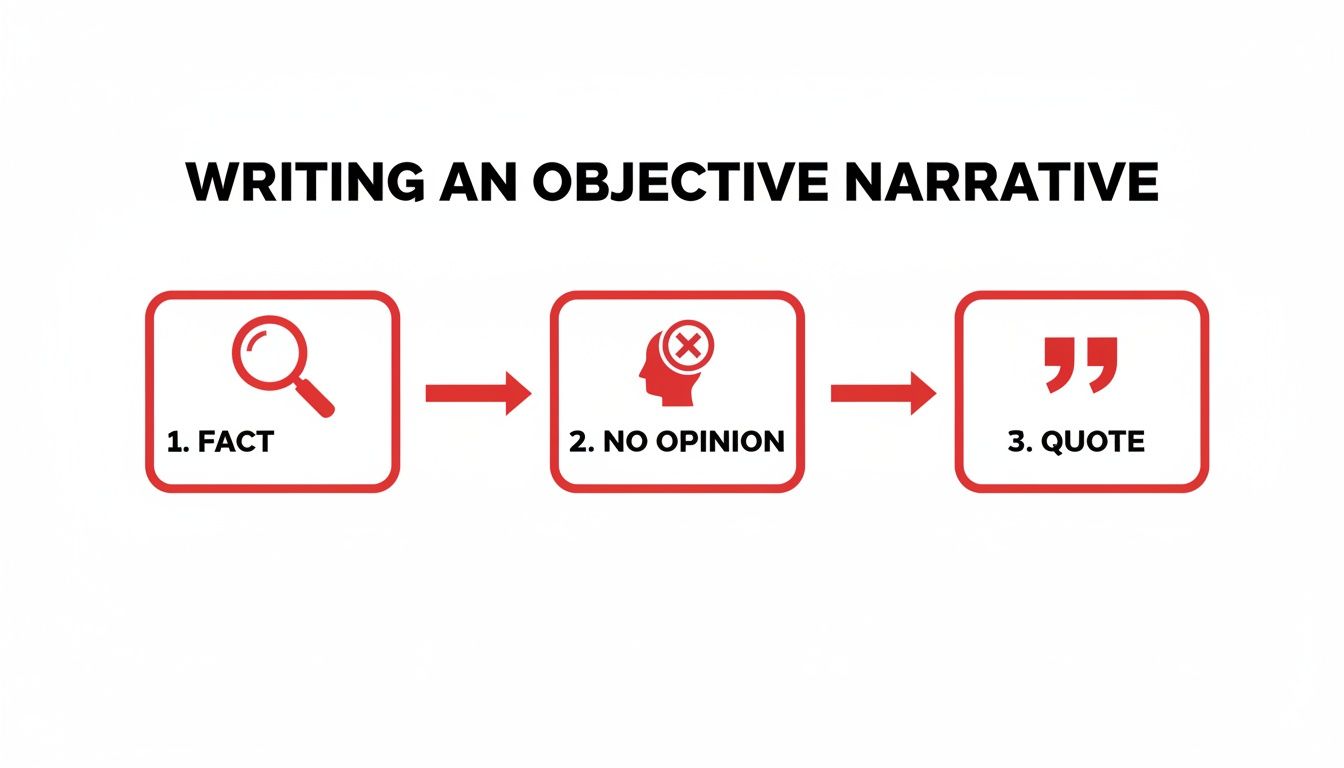
This flowchart breaks down the core idea of an objective narrative, which applies just as much to your visuals as it does to your writing. Stick to the facts. Leave out the opinions.
To make sure your visual evidence is clear and genuinely useful, keep these tips in mind:
- Take More Than You Think You Need: Start wide to give context of the whole area. Then move in for medium shots of specific things. Finally, get close-ups of key details—an injury, a broken door, a spill on the floor.
- Use Reference Points for Scale: When you're photographing something small, like a dent in a wall or a crack in the pavement, pop a familiar object next to it. A coin or even your pen can give an immediate sense of scale to anyone looking at the photo later.
- Note the Time and Angle: Don’t just dump photos into a folder. In your report, refer to each photo and briefly describe what it shows, including when you took it and where you were standing. For example, "Photo 001 – View of wet floor facing east entrance, taken at 22:15."
Logging Physical Evidence and CCTV Footage
Sometimes you’ll have physical objects or CCTV recordings to deal with. These are critical pieces of the puzzle, and the key here is maintaining the chain of custody. This is simply a documented log of who has handled the evidence from the moment it was collected.
The chain of custody is an unbroken record of possession. If you can't prove who had the evidence and when, you risk it being deemed inadmissible or unreliable in any formal proceeding.
If you find a physical item—say, a broken lock or a discarded personal effect—it needs to go into a sealed, labelled bag. The label must include the date, time, location it was found, and the name of the person who collected it. Simple.
Your process for CCTV footage has to be just as tight. It's not enough to just say it exists. You must:
- Identify Specific Timestamps: Pinpoint the exact start and end times of the relevant clip (e.g., "Camera 3, footage from 14:05 to 14:12").
- Export and Secure a Copy: Don't wait. Immediately export the clip and save it to a secure, backed-up location. Never rely on the system's rolling memory; that footage could be overwritten in days, sometimes even hours.
- Document the Export: Make a note of who exported the footage, on what date, and exactly where the file is now stored.
Getting this part right is fundamental. It's how you learn how to write an incident report that doesn't just describe an event, but actually protects you and your organisation.
Common Reporting Mistakes and How to Avoid Them
Knowing how to write an incident report is a fundamental skill, but even seasoned pros fall into common traps that can seriously weaken their documentation. A small misstep in the heat of the moment can have massive ripple effects, impacting everything from legal defence and insurance claims to future safety planning.
These aren't just minor typos; they're the kind of flaws that can make a report seem subjective, incomplete, or flat-out untrustworthy. Let's walk through the most frequent errors I've seen in the field and, more importantly, how to sidestep them. This is about more than just avoiding blame—it's about building a rock-solid professional habit.
Mistake 1: Delaying the Report
This is hands down the most frequent and damaging mistake. We've all been there—the incident is over, the adrenaline is fading, and the last thing you want to do is paperwork. But memory is fickle, and critical details start to vanish with every passing hour.
A report written a day later will never be as sharp as one completed right after the event. Not only does it look unprofessional, but in a legal setting, a delayed report is an easy target. Lawyers will question the accuracy of every detail, suggesting your memory isn't reliable.
- Actionable Insight: Make it a non-negotiable rule to write the report as soon as the situation is stable and secure. If you absolutely can't do the full write-up immediately, grab a notebook or use your phone's notes app to jot down the core facts: times, names, locations, and key actions. These notes will be your lifeline when you sit down to write the formal document later.
Mistake 2: Using Jargon and Vague Language
It’s easy to slip into shorthand and technical jargon, but your report needs to be understood by everyone. The audience might include your manager, HR, a lawyer, or an insurance adjuster—people who have no idea what your site-specific acronyms mean. Vague language just creates confusion and leaves dangerous room for misinterpretation.
Think about it from their perspective. A guard at a construction site writes, "Checked the north perimeter, all 10-4." To anyone outside your immediate team, that’s completely useless. A much better entry would be, "Conducted a visual inspection of the northern fence line at 02:30; all gates were secure and no signs of unauthorised entry were observed." Clear, concise, and professional.
Mistake 3: Including Subjective Opinions
I can't stress this enough: objectivity is everything. The moment you inject personal feelings, assumptions, or opinions into a report, you compromise its integrity. Statements like "He seemed drunk" or "She was looking for trouble" are judgments, not verifiable facts.
A report's strength comes from its factual foundation. The moment you introduce your opinion, you invite others to question the entire document's credibility. Stick to what you saw, what you heard, and what you did.
The goal is to describe actions, not to guess someone's intentions.
- Actionable Insight: Instead of writing "He seemed drunk," describe the evidence that led you to that thought. "He was unsteady on his feet, his speech was slurred, and there was a strong smell of alcohol on his breath." This gives the reader objective facts and allows them to draw their own conclusion.
Poor documentation has real financial consequences, too. The ASD's Annual Cyber Threat Report recently highlighted that the average cost of cybercrime for small businesses jumped by 14% to $56,600 per incident. A detailed, factual report is your best tool for supporting insurance claims and proving you followed protocol. You can get the full details in the Annual Cyber Threat Report to see just how serious these threats are.
Mistake 4: Forgetting Signatures and Dates
An unsigned or undated report is basically an anonymous note. It has no official standing. Signatures from the author, any witnesses who gave a statement, and a reviewing supervisor are what give the document its authenticity and create a clear chain of accountability. Forgetting this final step is like doing all the hard work and then leaving the door unlocked.
- Actionable Insight: This one’s easy. Create a simple sign-off checklist for every report. Make "All Signatures Obtained" and "Date and Time Confirmed" the final two boxes to tick before a report is considered complete. It's a simple habit that will save you from major headaches down the line.
FAQ: Frequently Asked Questions on How to Write an Incident Report
Even with a perfect template, the real world throws curveballs. Knowing the theory of how to write an incident report is one thing, but what do you do when things get complicated on the ground? This FAQ section provides actionable answers to common questions.
How Quickly Do I Need to Write the Report?
The golden rule is simple: the sooner, the better. You should aim to get the report written and submitted as soon as it's safe to do so, ideally before your shift ends.
Why the rush? Because details fade fast. What seems crystal clear minutes after an event can become a blurry mess hours later. If a report ever ends up in a legal setting, one written immediately carries far more weight than one delayed. A delay can make it seem like the details are less reliable or, worse, constructed after the fact.
Of course, sometimes you're still in the thick of it. If you can't get to the full report straight away, grab a notebook or use your phone to jot down the essentials: exact times, names, what actions were taken. These quick, factual notes will be your best friend when you finally sit down to write the full thing.
What If Someone Refuses to Give Their Details?
First things first: your job is to de-escalate, not demand. Never try to force or intimidate someone into giving you their personal information. Your priority is always safety. If someone refuses to provide their details, you simply document that refusal. Make a note of the exact time and, if you can, what they said. Quoting them directly is powerful.
Practical Example: "At 14:10, I asked the individual for his name to include in the report. He stated, 'I'm not telling you anything,' and then walked away."
Your next step is to provide the best possible physical description you can. Think like a witness: approximate height, build, hair colour, clothing, and any unique features like tattoos, glasses, or a particular brand of shoes. Note the direction they went. This shows you followed procedure, respected the individual's refusal, and still gathered valuable information for any follow-up.
Am I Including Too Much Detail?
This is a common worry. It’s almost impossible to include "too much" factual detail, but it's very easy to include too much irrelevant or subjective detail. The trick is to stick to what is objective, verifiable, and directly helps someone understand what happened.
Think about a slip-and-fall incident. The weather conditions are absolutely crucial.
- Relevant Detail: "Heavy rain had been falling for about an hour, causing visible water pooling on the pavement in the north car park."
- Irrelevant Detail: "The person who fell was wearing an old-looking jacket and seemed to be in a bad mood."
Keep one question in your mind as you write: 'Is this a verifiable fact that helps explain the incident?' If the answer is yes, put it in. If it's just your opinion, an assumption, or a random observation, leave it out.
Can I Change a Report After I've Submitted It?
Once a report is in the system, that original document should be considered locked. You should never go back and edit it directly, as this can compromise the integrity of the record. But people make mistakes, and sometimes new information comes to light. The correct way to handle this is by filing an addendum. An addendum is simply a new document that you attach to the original report to correct or add information. It's a clean and transparent process.
- Link to the Original: Start by clearly referencing the original report's ID number, date, and time.
- Explain the 'Why': Briefly state the purpose of the addendum. For example, "This addendum corrects the spelling of Witness B's last name in the original report."
- Provide the New Info: Clearly state the corrected or new information.
- Sign and Date It: Just like the original report, sign and date the addendum.
This keeps the entire record honest and accurate. Always double-check your own company's specific policy on amendments, as the exact process can sometimes vary.
At GM GROUP Services, we know that professional security is built on a foundation of clear, accurate reporting and proactive risk management. Our licensed teams across NSW, VIC, QLD, and the ACT are trained to handle any situation with skill and document it with precision, protecting your people, property, and reputation. Find out more about our security solutions.